RESOURCES FOR THE COLD OPENERS PROJECT
Welcome! If you've landed here from coldopens.ca, just click below to get the resource you need.
ADDING INTERACTIVITY TO INDESIGN
When I first started adding interactivity to my digital publications, I often found myself wishing I had an example to go by, just so that I could see for myself how others had made it work.
By making a selection of these available here, my hope is that they'll ease the inevitable learning curve that goes along with adding interactive elements to an InDesign document.
If you're looking for step-by-step instructions, be sure to track down Bob Bringhurst's DPS LEARN, which is available on the mobile App Store. From basic layouts to more advanced overlays, you'll find there invaluable advice on how to create any number of interactive elements in InDesign.
The files posted below will, however, actually give you the chance to play around with finished versions of these elements so that you can see for yourself how they work.
Each of them is sized for the iPad Pro, which is the final destination for my publications. Because I run my displays offline, I value resolution over file size, and so the files themselves are quite large. Even so, once you see the concepts at work, you'll be able to create your own versions in a manner that best suits your needs.
Rather than using Adobe Experience Mobile Manager, which is wonderful, I'm sure, but exorbitantly expensive, I use In5 along with the KioskPro app to share my work. If you haven't already, be sure to check them out, as they work well together.
Be sure to let me know if you find these files helpful. Keep in mind, too, that I'll be adding more content to this page over time, so please do drop back in often.
ICONS FOR INTERACTIVE ELEMENTS
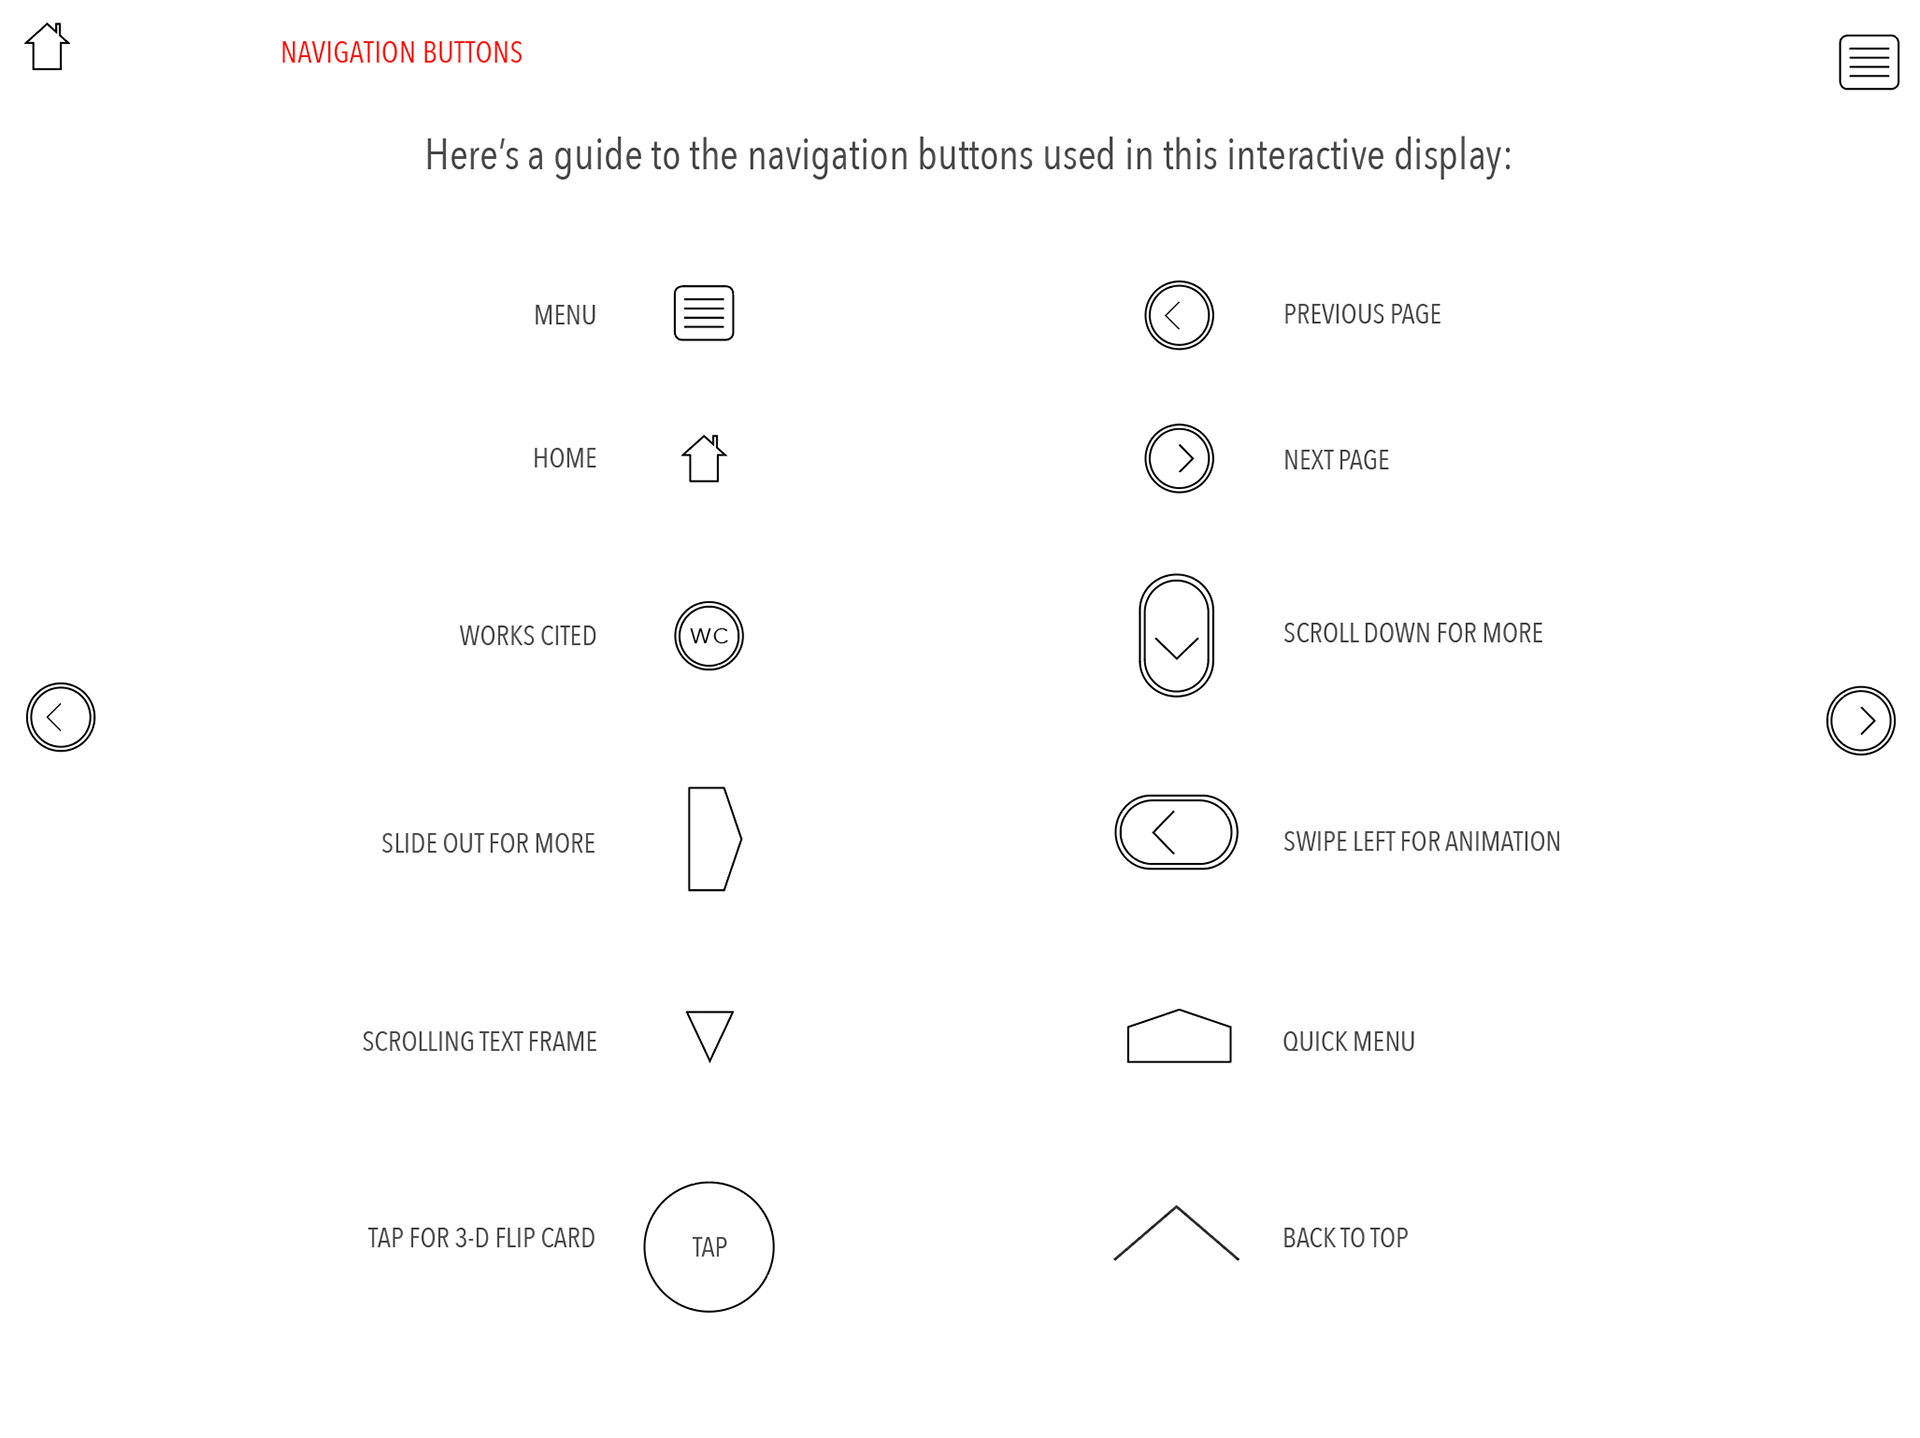
If you're looking to include interactive elements in a digital publication, you'll need icons to call attention to these so that your reader will understand how to use them. It's also a great idea to include a legend that explains precisely what each one does.
While these icons are relatively simple to create, putting together an entire set can be a bit tedious, and so I'm posting a collection of these below in hopes of saving everyone some time and energy.
CREATING PULL OUT DRAWERS
Pull out drawers are great because they enable you to add more content to a page without crowding elements. They also make it possible for your reader to delve more deeply into a topic; this expansiveness enables you to accommodate multiple levels of interest and engagement in a single document.
You can create a pull out drawer using a scrollable frame, or by adding a multi-state object. Which you choose will depend on where you ultimately intend to publish your project, as well as the kind of effect you'd like to achieve.
Here's a super short clip that illustrates how you can use a pull out drawer to house a quick menu at the bottom of a page. In this instance, the drawer is simply a scrollable frame that the reader can retrieve by pulling up:
If you'd like to create a quick menu, here's an InDesign file that may help:
CREATING A SIDE DRAWER
Pull out drawers work just as well when positioned on the side of the screen. They can house an endnote or an aside that you feel your reader may find interesting. Here's an example of a pull out drawer that provides additional information:
If you'd like to create this type of drawer, here's an InDesign file that may help: